エンジニアの大場です。
UI Toolkitの知識0の自分がUI Toolkitの勉強をするためコンソールUIを実装した話です。
エディタUIの実装ではなくランタイムUIの実装の話となります。
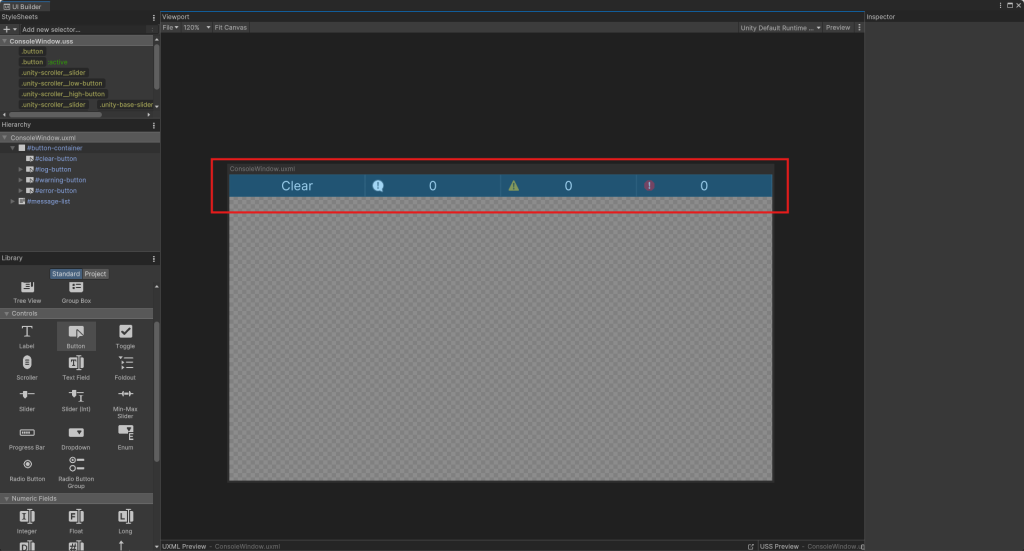
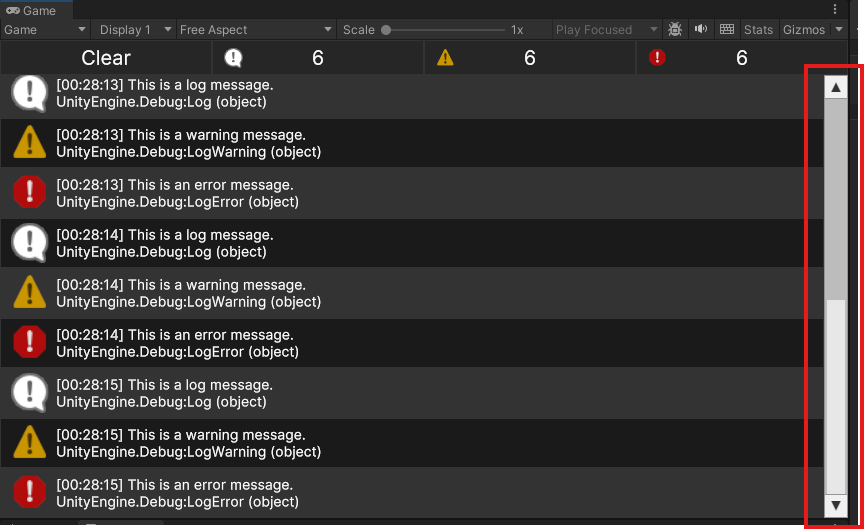
最終実装はこの通りです。
1. はじめに
初心者向けの記事となっているが「UI Toolkitとは」や「基本的な操作」は省きます。
また普段UI Toolkitを使っている中級者・上級者向けではないのでご理解ください。
自分はWeb実装(CSS, HTML)の知識に明るくなく実装に苦戦しました。
(最後に触ったのは大学生の頃)
自分が実際に実装する前に学習したのはこれらの2つの動画で
動画を見た後にこの記事を読むことをおすすめします。
動画を見ることで「UI Toolkitとは」や「基本的な操作」が理解できます。
2. 環境
Windows
Unity 2022.3.41f1
URP 14.0.11
サンプルプロジェクトhttps://github.com/HRYooba/UIToolkit_ConsoleWindowSample
3. ConsoleWindowの実装
ConsoleWindow用のUI Document(UXML)を作成する。
3-1. 上部ボタン編
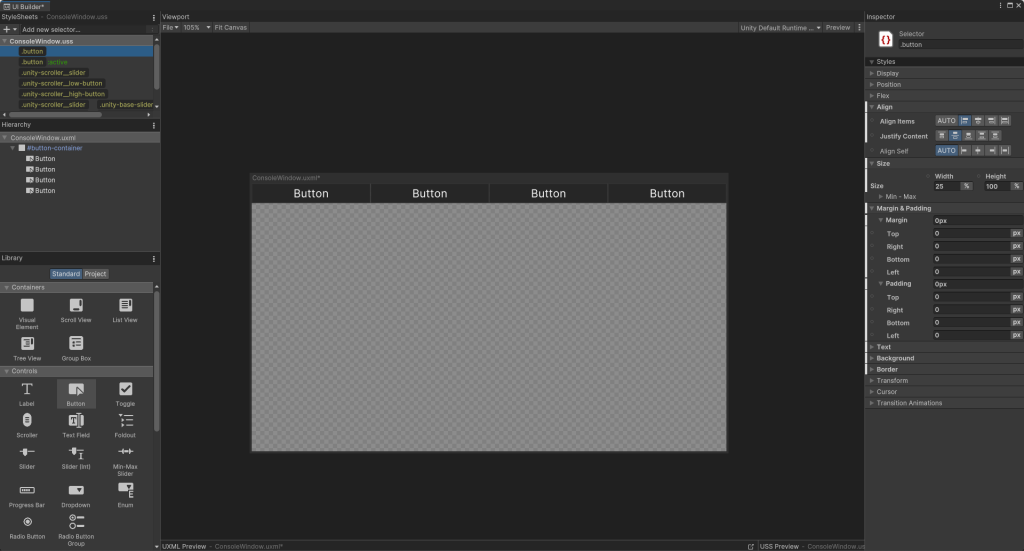
3-1-1. Visual Elementを配置し、Visual Element以下にButtonを4つ配置する
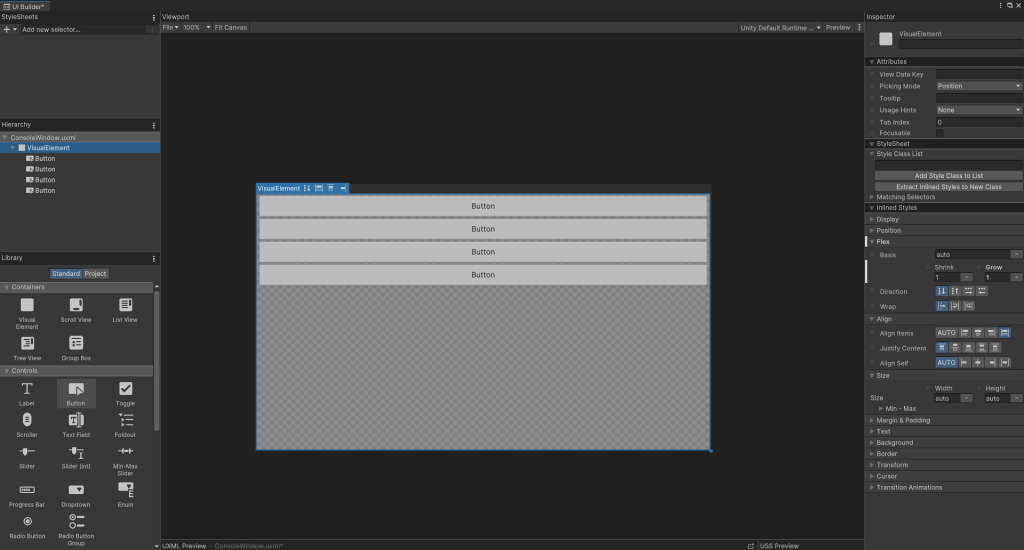
3-1-2. Visual Elementのスタイルを調整する
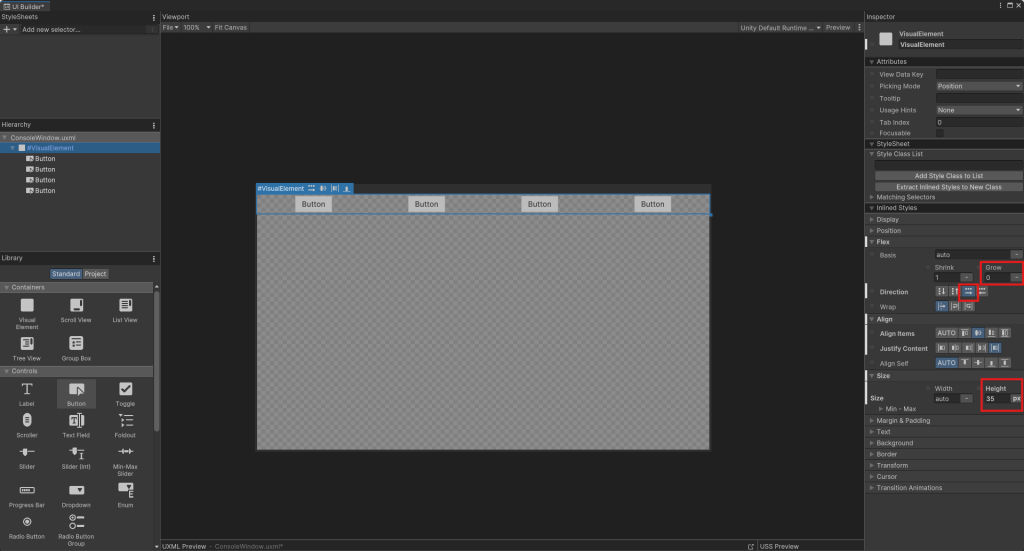
【苦戦ポイント】
Visual Elementのデフォルトの設定が縦並びになっているのでFlex/Directionを変更することで横並びになる。
またFlex/Grow=1がデフォルトなのでSize/Heightを変更してもサイズが変更されない。(Flex/Grow=0で解決)
※Flex/Grow・Shrinkがわからない場合は、CSSで使われる概念なので調べれば参考がたくさん出ると思います。
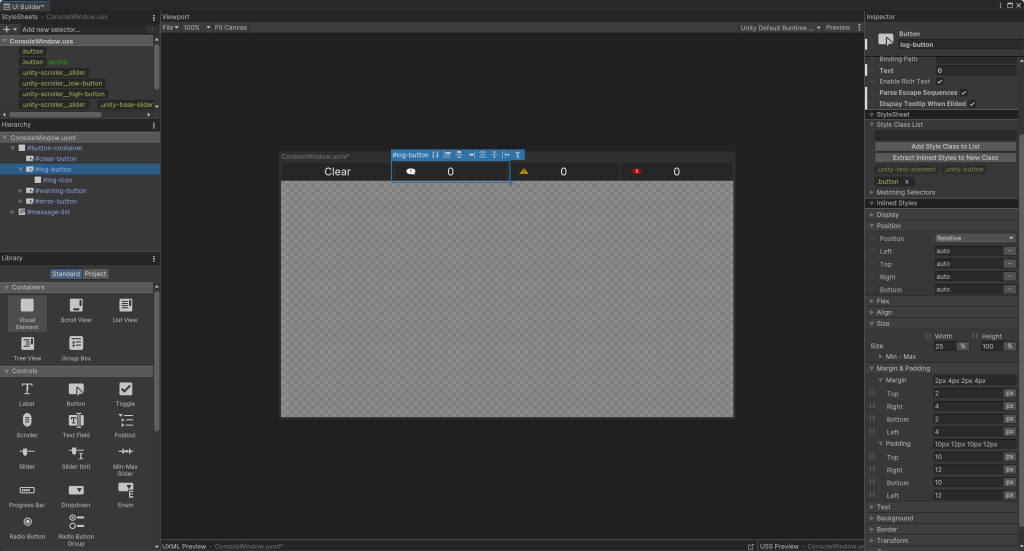
3-1-3. スタイルシート(USS)で作成したButtonのスタイルを適応する
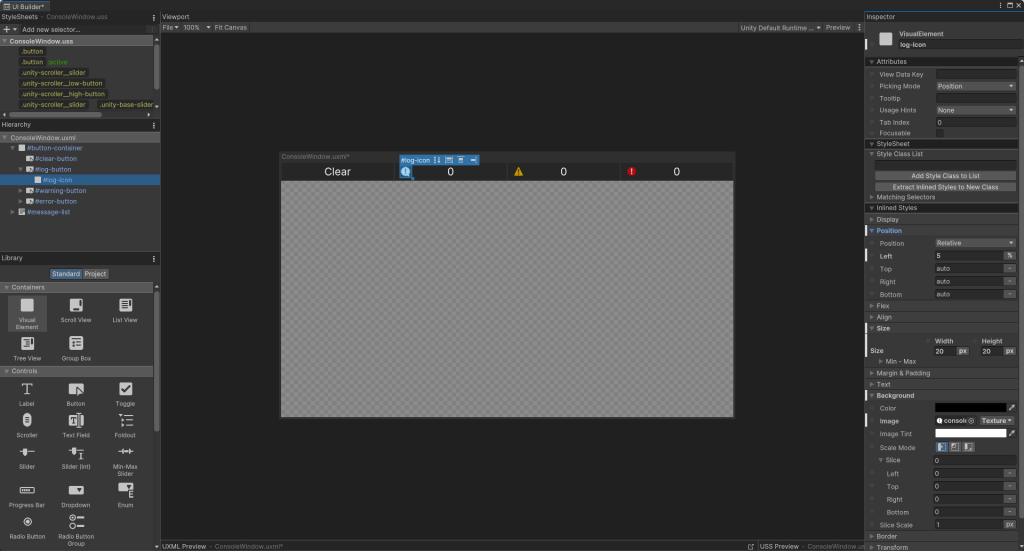
3-1-4. アイコン用VisualElementをButton以下に配置
【苦戦ポイント】
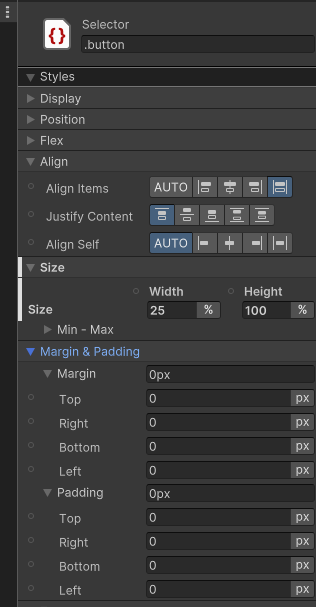
USSのスタイルを適応してもすべての値がButtonに適応されるわけではい。
正確に言うとUSSのスタイルの変更箇所(白いライン)のみ適応される。
この仕様を理解するまでにButton周りで苦戦したので説明します。
ButtonのMargin & Paddingにはデフォルトで値が入っている。
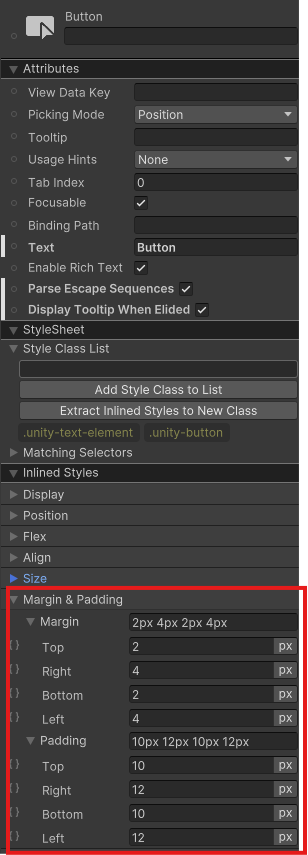
USSのスタイルはデフォルトだとMargin & Paddingは0pxになっている(左図)が改めて0pxを入力しない(右図)と適応されない。
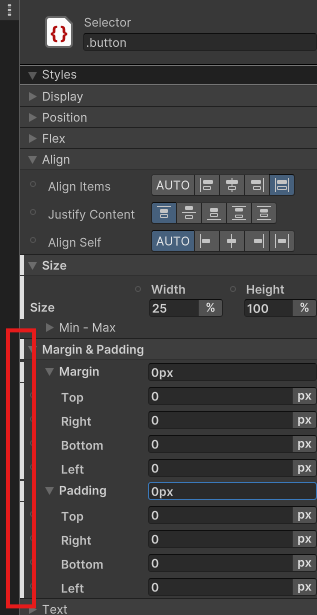
USSのスタイルのMargin & Paddingを変更しない状態でスタイルを適応するとアイコンが画像のようにつぶれてしまう。
3-2. 下部メッセージリスト編
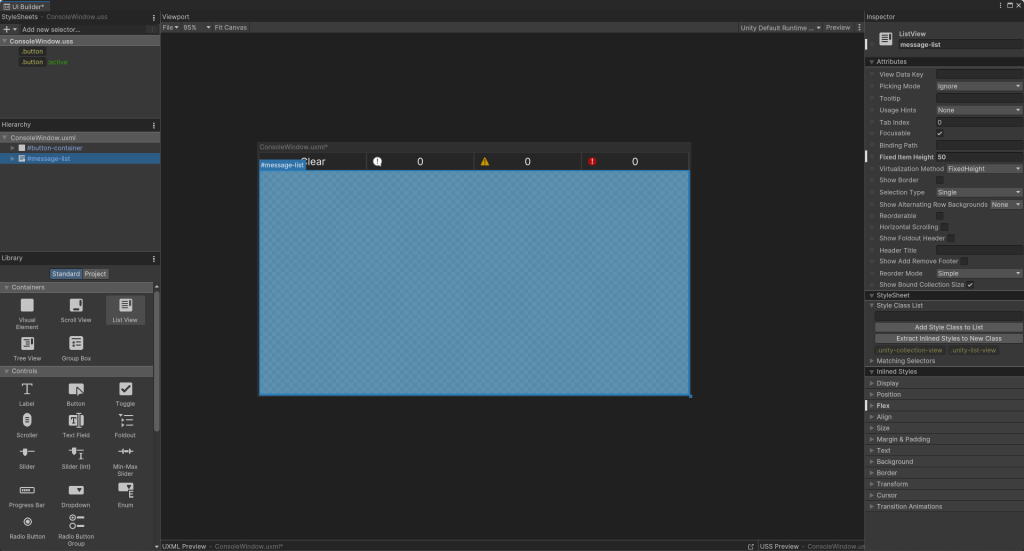
3-2-1. List Viewを配置
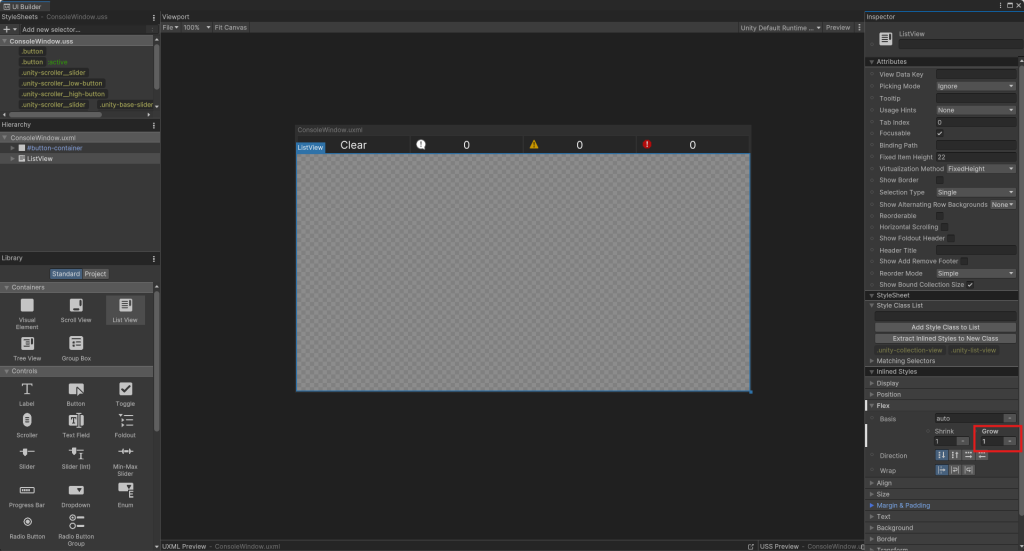
画面の余りを埋めるためFlex/Grow=1にする。
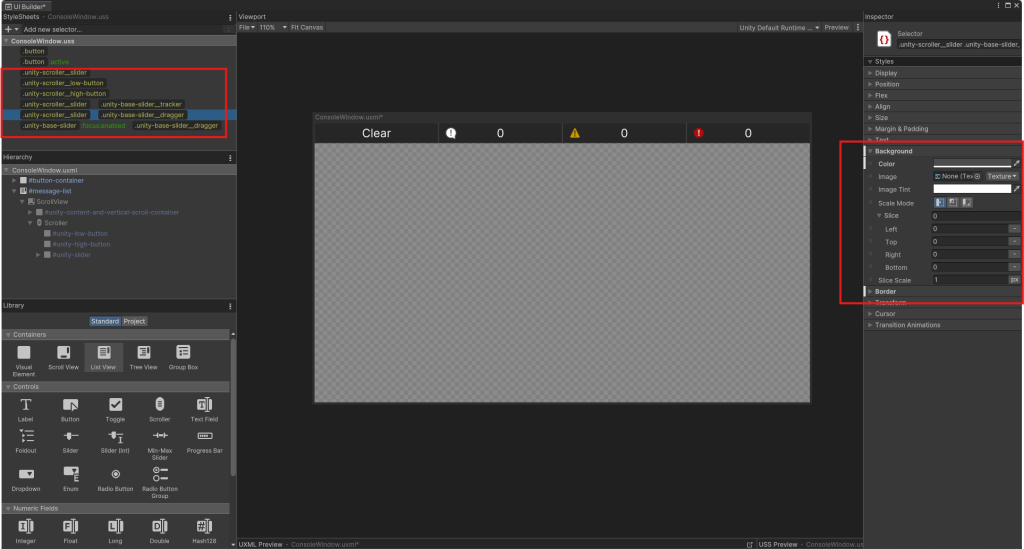
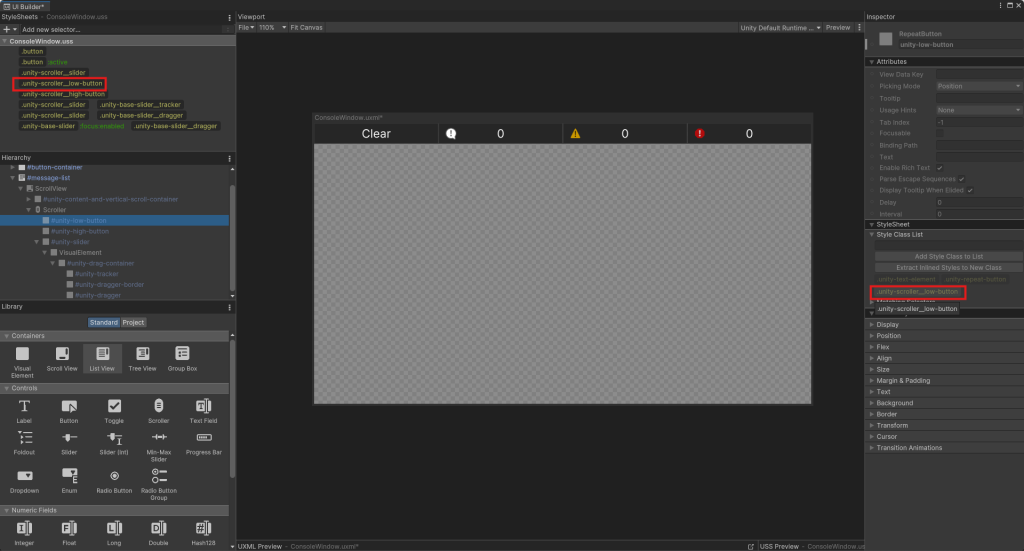
3-2-2. List Viewにスタイルシート(USS)のスタイルを適応する
UI ToolkitのList Viewのスクロールバーはデフォルトだとダサい。
【苦戦ポイント】
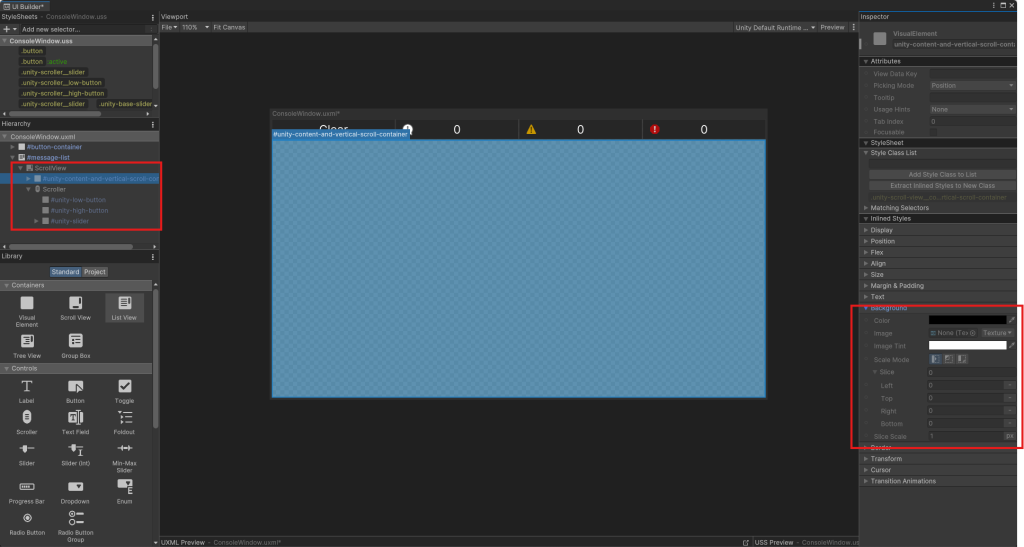
ただUI BuilderからList Viewのスタイルの変更をしようとするとグレー表示になっていて変更できない。
これは読み取り専用Elementになっているかららしい。 (https://discussions.unity.com/t/styling-the-scrollbar-of-a-scrollview/856485)
デフォルトで定義されているスタイルクラスをUSSで再度定義することで解決できる。
4. MessageItemの実装
List Viewに入るMessageItem用のUI Document(UXML)を作成する。
4-1. 格納用View Elementとアイコン用View ElementとTextを配置
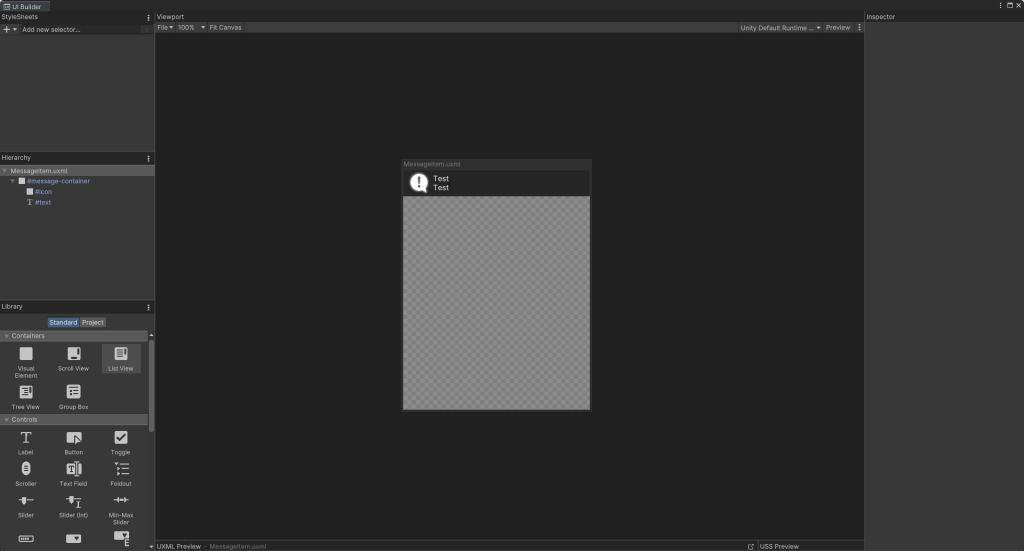
スタイルを整えると画像のようになる。
特に難しいところはないので詳細は省きます。
4-2. ConsoleWindowのFixed Item Heightを変更
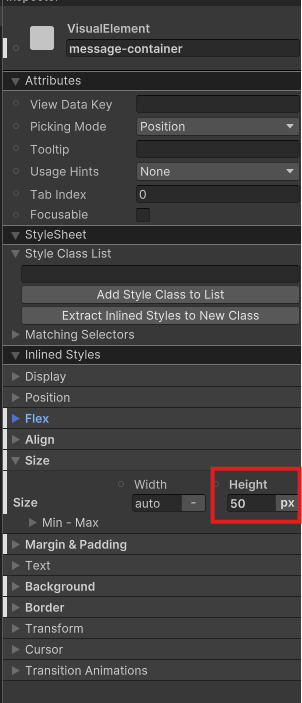
MessageItemのSize/Heightを設定する。
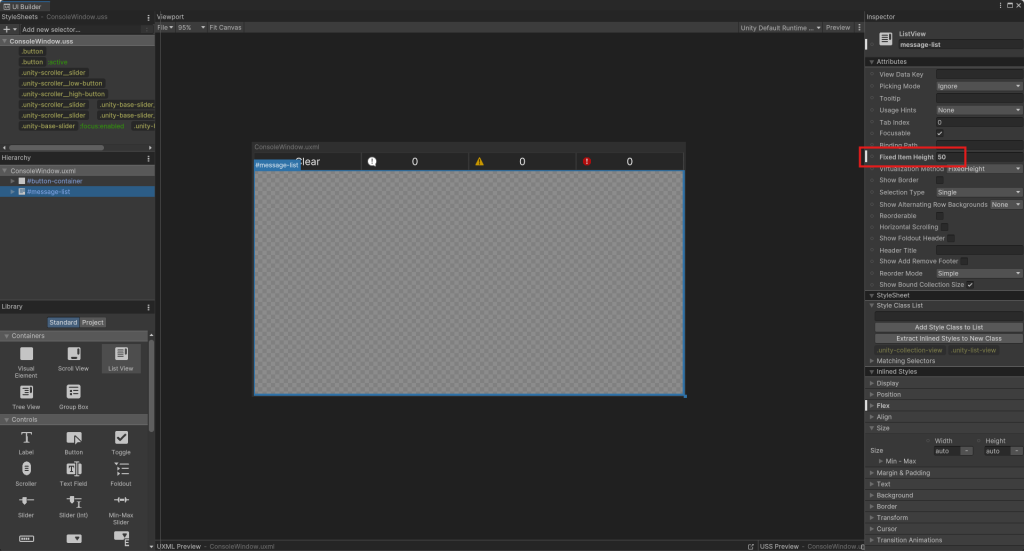
ConsoleWindowのList ViewのFixed Item Heightを同じ値に設定する。
これを設定することでList ViewにMessageItemが入った時に被らずに整列されるようになる。
これでUXMLとUSSの実装が終了。
5. UI制御用のC#スクリプトの実装
スクリプトの全体はこちらです。
using System;
using System.Linq;
using System.Collections.Generic;
using UnityEngine;
using UnityEngine.UIElements;

[DefaultExecutionOrder(-10000)]
[RequireComponent(typeof(UIDocument))]
public class ConsoleWindow : MonoBehaviour
{
    [SerializeField] private UIDocument _uiDocument;

    [Header("MessageItem")]
    [SerializeField] private VisualTreeAsset _messageItemTemplate;
    [SerializeField] private Texture2D _logIcon;
    [SerializeField] private Texture2D _warningIcon;
    [SerializeField] private Texture2D _errorIcon;
    [SerializeField] private Color _color1 = new Color(0.1f, 0.1f, 0.1f, 1f);
    [SerializeField] private Color _color2 = new Color(0.2f, 0.2f, 0.2f, 1f);

    private Button _clearButton;
    private Button _logButton;
    private Button _warningButton;
    private Button _errorButton;
    private ListView _messageListView;
    private Scroller _messageListScroller;

    private readonly List<(string timeCode, string Condition, string StackTrace, LogType Type)> _messages = new();

    private void Awake()
    {
        Application.logMessageReceived += OnLogMessageReceived;
    }

    private void OnDestroy()
    {
        Application.logMessageReceived -= OnLogMessageReceived;
    }

    private void Start()
    {
        var root = _uiDocument.rootVisualElement;

        _clearButton = root.Q<Button>("clear-button");
        _logButton = root.Q<Button>("log-button");
        _warningButton = root.Q<Button>("warning-button");
        _errorButton = root.Q<Button>("error-button");
        _messageListView = root.Q<ListView>("message-list");
        _messageListScroller = _messageListView.Q<Scroller>();

        // setup buttons
        _clearButton.clicked += OnClearButtonClicked;

        // setup logListView
        _messageListView.itemsSource = _messages;
        _messageListView.makeItem = () => _messageItemTemplate.Instantiate();
        _messageListView.bindItem = BindItem;

        // setup scroller
        _messageListScroller.value = _messageListScroller.highValue;
    }

    private void UpdateView()
    {
        if (_messageListView == null
            || _logButton == null
            || _warningButton == null
            || _errorButton == null)
        {
            return;
        }

        _messageListView.RefreshItems();

        _logButton.text = _messages
            .Count(x => x.Type == LogType.Log)
            .ToString();

        _warningButton.text = _messages
            .Count(x => x.Type == LogType.Warning)
            .ToString();

        _errorButton.text = _messages
            .Count(x => (x.Type == LogType.Error)
                    || (x.Type == LogType.Exception)
                    || (x.Type == LogType.Assert))
            .ToString();

        // scroll to bottom
        if (_messageListScroller.value + _messageListView.fixedItemHeight >= _messageListScroller.highValue)
        {
            _messageListScroller.value = _messageListScroller.highValue;
        }
    }

    private void BindItem(VisualElement element, int index)
    {
        var (timeCode, condition, stackTrace, type) = _messages[index];

        element.Q<VisualElement>("message-container").style.backgroundColor = index % 2 == 0 ? _color1 : _color2;

        var message = $"[{timeCode}] {condition}\n{stackTrace.Split('\n')[0]}";
        element.Q<Label>("text").text = message;

        element.Q<VisualElement>("icon").style.backgroundImage = type switch
        {
            LogType.Log => _logIcon,
            LogType.Warning => _warningIcon,
            LogType.Error => _errorIcon,
            LogType.Assert => _errorIcon,
            LogType.Exception => _errorIcon,
            _ => throw new ArgumentOutOfRangeException()
        };
    }

    private void OnLogMessageReceived(string condition, string stackTrace, LogType type)
    {
        _messages.Add((DateTime.Now.ToString("HH:mm:ss"), condition, stackTrace, type));
        UpdateView();
    }

    private void OnClearButtonClicked()
    {
        _messages.Clear();
        UpdateView();
    }
}
冒頭で紹介した動画を見ても苦戦したところだけを解説します。
5-1. List Viewに動的にインスタンスを追加
_messageListView.itemsSource = _messages;
_messageListView.makeItem = () => _messageItemTemplate.Instantiate();
_messageListView.bindItem = BindItem;ListView.itemsSourceにデータソース(配列/リストなど)を設定。
設定することでデータソースとのリンクができる。
配列の変更があるとListViewが自動で追加/削除の処理をしてくれる。
ListView.makeItemにItemのVisualElement生成のコールバックを登録する。またListView.bindItemにデータをItemのVisualElementにバインドする処理を登録する。
データソースに変更(Add/Remove/Clearなど)があれば、ListView.RefreshItems()を呼び出す必要がある。
※この関数が呼ばれると現在表示されている項目を再バインドされる (bindItemの処理が呼ばれるっぽい?)
6. まとめ
慣れれば従来のuGUIより作りやすい。
特にUIのデザインとしてのスクリプト(UXML, USS)とUIの処理のスクリプト(C#)が分かれることによって開発がしやすい&設計がしやすい。
ただWeb実装の知識が乏しいエンジニアには学習コストが少し高い気がした。
現に自分もUI Toolkitの知識0から学習してコンソールUIを作るのに丸1日かかった。
また現時点でインターネット上にも資料が少なく解決策を探すのに手間取った。
UI Toolkitを触る人で自分と同じような苦戦を強いられる方もいると思うので助けになればです。